Who doesn’t love a rainbow? I know I do, and they seem to have become even more popular this year! Not surprising with 2020 being the year that it has been, I think we all need the positivity that looking at a rainbow can bring.
These fringed rainbow wall hangings are pretty simple to make, and you can have lots of fun playing around with colour. I have made the usual rainbow colour, as well as replacing the red with bright pink, a pastel version, and even a natural/earth-toned one. I also have blue and purple-hued ones in my long mental to-do list, as well as revered colours and more, and hopefully will be able to make them soon!
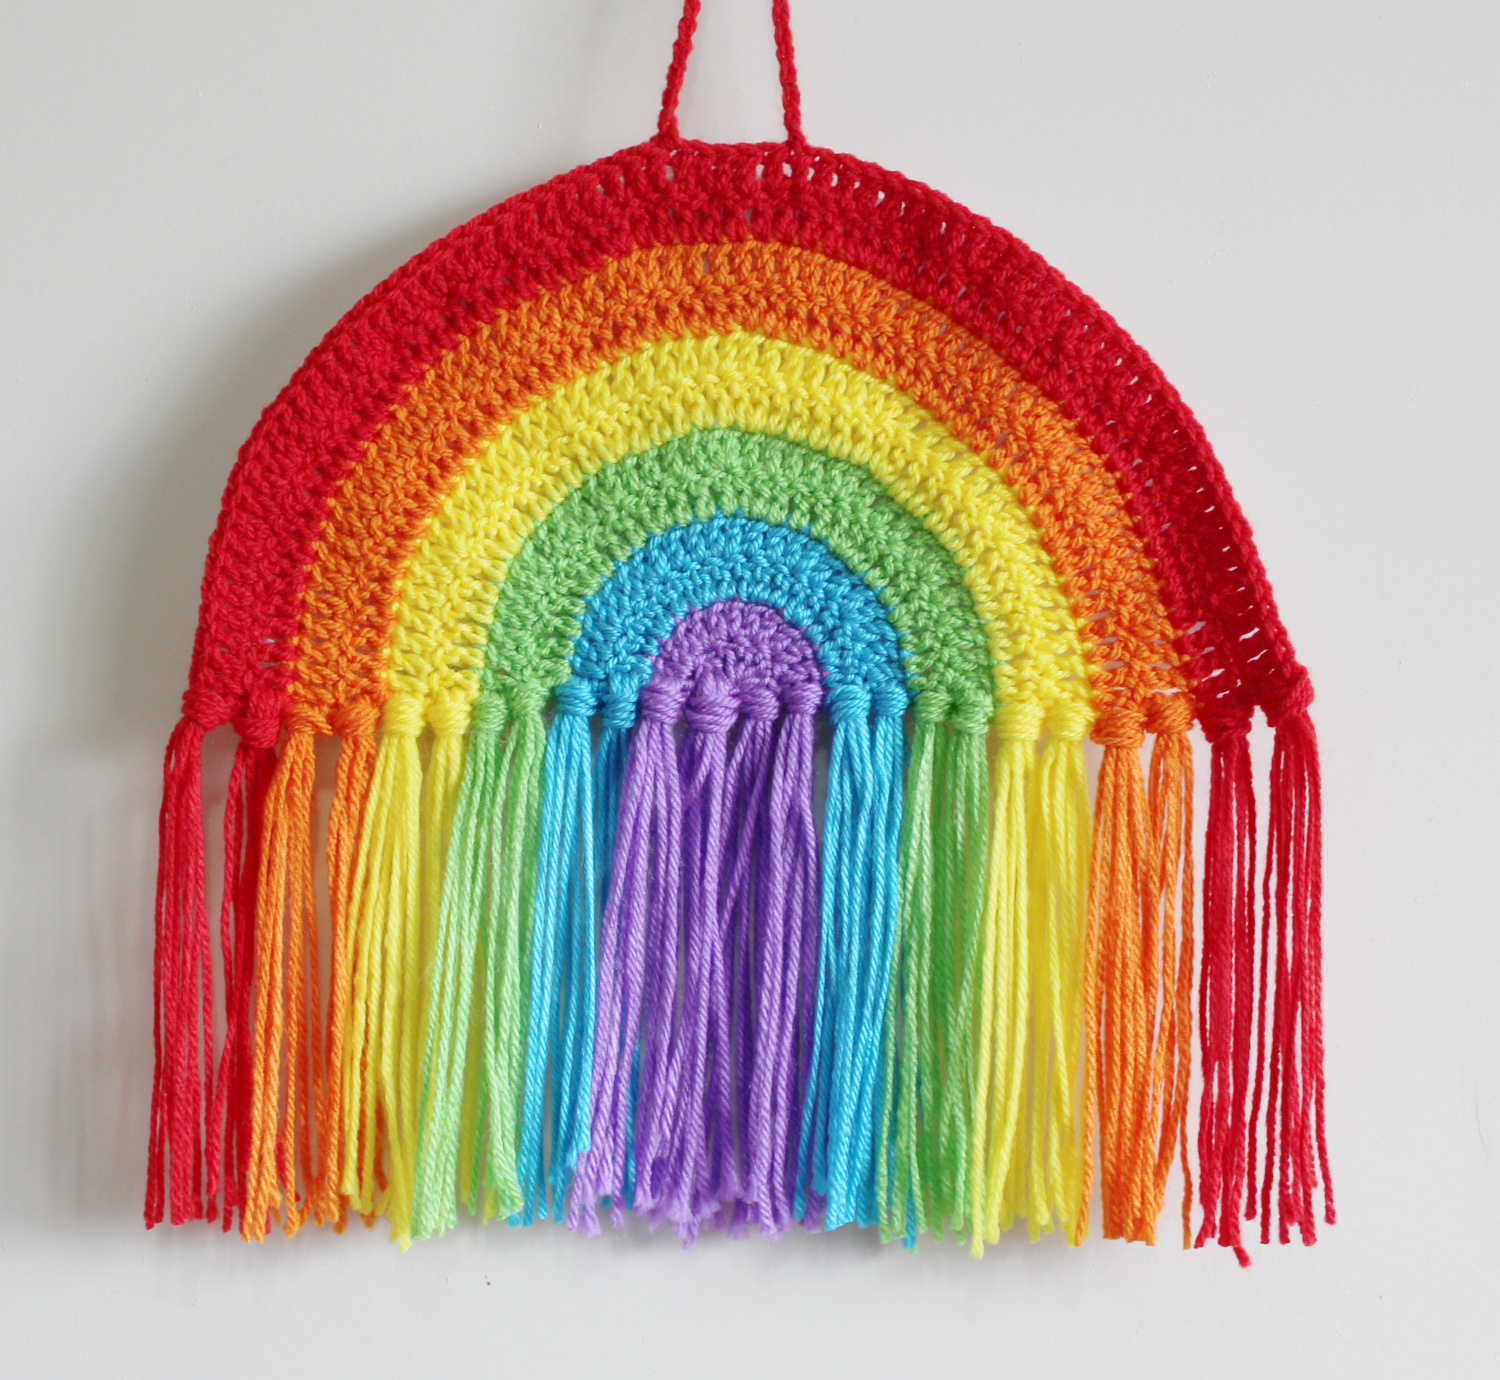
Fringed Rainbow Wall Hanging Crochet Pattern
Materials
- 4mm hook
- 8ply/DK acrylic yarn of your choice of colours, I used 6 different colours, and none require a full skein.
Purple (c1), Blue (c2), Green (c3), Yellow (c4), Orange (c5), Red (c6) - large eyed yarn needle – for sewing in your ends
- scissors
Abbreviations (US)
- ch – Chain
- st – stitch
- DC – Double Crochet
Finished size
30cm wide x 28 cm tall
Notes
The Chain 2 does not count as a stitch, so the first DC of each round goes into the same stitch as the chain.
When finishing off with a colour, leave a long tail, and you can then knot it into your fringe and save yourself some ends to sew in.
Instructions
Using c1, create a magic circle, or ch 4 and slip stitch to first ch to make a loop
- Rnd 1: Chain 2, 6 DC into the loop/circle, ch2 turn
- Rnd 2: 2DC in each stitch ch2, turn (12) change to c2
- Rnd 3: DC in first stitch, 2DC in next stitch repeat x6 ch2, turn (18)
- Rnd 4: Dc in first 2 stitches, 2DC in next stitch repeat x6, ch2, turn (24) change to c3
- Rnd 5: Dc in first 3 stitches, 2DC in next stitch repeat x6, ch2, turn (30)
- Rnd 6: Dc in first 4 stitches, 2DC in next stitch repeat x6, ch2, turn (36) change to c4
- Rnd 7: Dc in first 5 stitches, 2DC in next stitch repeat x6, ch2, turn (42)
- Rnd 8: Dc in first 6 stitches, 2DC in next stitch repeat x6, ch2, turn (48) change to c5
- Rnd 9: Dc in first 7 stitches, 2DC in next stitch repeat x6, ch2, turn (54)
- Rnd 10: Dc in first 8 stitches, 2DC in next stitch repeat x6, ch2, turn (60) change to c6
- Rnd 11: Dc in first 9 stitches, 2DC in next stitch repeat x6, ch2, turn (66)
- Rnd 12: Dc in first 10 stitches, 2DC in next stitch repeat x6, ch2, turn (72) Fasten off
Fringe
For the fringe, you will need 16 strands of each colour yarn, each approximately 35 cm long. To make things easier find an object to wrap the yarn around to get the appropriate length such as a book or small box.
Using 4 strands of the same colour, fold them in half and pass the folded loops from front to back over the bottom stitch on the rainbow, then draw the ends through the loops (this is called a larks head knot in macrame). If you are having trouble feeding it through, using your hook to grab the loops is a big help.
complete those steps on the beginning and end of each row, so you have 4 lots of fringe for each colour, 24 in total.
Then trim your fringe to the length you desire. If your yarn is a little wrinkly (for want of a better word), I found using a hair straightener on the fringe makes it look fabulous, and easier to trim.
Then just add a string to the top to hang it and your fringed rainbow wall hanging is complete!


Hope you enjoy the pattern, and if you post your finished product on social media, please tag me @crochetbycarms so I can praise your creation!
Love Carmen
xoxo
[…] The Fringed Rainbow Wall Hanging Free Crochet Pattern […]